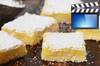
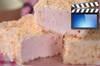
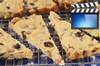
26 Years of Award Winning Baking & Dessert Video Recipes

breakfast & brunch bars & squares cupcakes shortbreads breads youtube channel
about us
recipe index
substitutions
ingredients
glossary
conversions
weight vs volume
easter baking
apple recipes
pumpkin recipes
cranberry recipes
chocolate recipes
healthy baking
eggless recipes
comfort foods
blueberry recipes
biscotti recipes
pudding recipes
english tea party
trifle recipes
ice cream recipes
strawberry recipes
lemon recipes
thanksgiving baking
candy recipes
halloween baking
valentine's baking
christmas cookies
christmas baking
christmas candy
baking history
bibliography

 
Subscribe Now
 

Marshmallow Squares Recipe & Video

Printer Friendly Page

My mom was quite a home baker. Hardly a night went by that she didn't offer us something sweet after our meal. Of all the things she baked, these Marshmallow Squares were one of my favorites. Marshmallow Squares, also called Dream Squares or Pink Dreams, are a three layered bar. They start with a shortbread base, topped with a fluffy and sweet marshmallow filling, and then garnished with loads of toasted coconut. I always liked how she colored the marshmallow a pretty pink as it just seemed to make them all the more appealing.  

There are three steps to this Marshmallow Square. Since the marshmallow filling doesn't need to be baked, the first step is to pre bake the shortbread crust. Then, while it's cooling, the next step is to make the marshmallow filling. This marshmallow is a bit different than the other marshmallow recipe on the site that involves making a sugar syrup. This marshmallow is simply a beaten mixture of unflavored powdered gelatin that has been activated, granulated white sugar, confectioners sugar (powdered or icing sugar), baking powder, salt, and vanilla. I love how the marshmallow becomes so wonderfully soft and fluffy, like whipped cream. The finishing touch is some toasted dried coconut which adds a delightful crunch. You can use shredded or flaked coconut and it can be either sweetened or unsweetened.

For the marshmallow I use unflavored powdered gelatin which is commonly sold in a small box which holds four paper envelopes, each containing 1/4 ounce (7 grams) (scant tablespoon) of tiny granules. These granules are tasteless, colorless, and odorless and in order for them to become a thickening agent, you need to first soften them in cold water until they become all swelled and spongy, and then warmed until the gelatin completely dissolves.

Related Recipes You May Like

Homemade Marshmallows

Peanut Butter Marshmallow Bars

Chocolate Marshmallow Cupcakes

Lemon Bars

Meringue Ghosts

Coconut Marshmallows

Marshmallow Squares: Preheat oven to 325 degrees F (165 degrees C) and place the rack in the center of the oven. Lightly butter, or spray with a non stick cooking spray, an 8 inch (20 cm) square baking pan.

In the bowl of your electric mixer, or with a hand mixer, beat the butter until creamy and smooth. Add the brown sugar and beat until incorporated. Beat in the flour and salt until the mixture starts to form clumps. Press the dough evenly and firmly onto the bottom of the pan. Lightly prick the dough with the tines of a fork. Bake for about 20 minutes or until the shortbread is set and beginning to brown around the edges. Remove from oven and place on a wire rack to cool while you make the filling.

Filling: Place the cold water in a saucepan and then sprinkle the gelatin over the top. Let stand for five minutes or until the gelatin is swelled and spongy. Stir in the granulated white sugar and salt and place saucepan over medium heat. Heat, stirring constantly, until the gelatin and sugar are dissolved and mixture is hot to the touch. Remove from heat and stir in the confectioners sugar. Let cool to room temperature.

When cool, pour into your mixing bowl, fitted with the whisk attachment, (can use a hand mixer) and beat until foamy. Add the baking powder, vanilla extract, and about 2 drops of red food coloring. Continue to beat on high speed until the mixture is very 
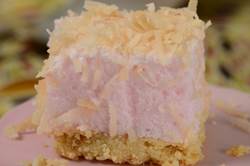
thick and holds stiff peaks. This will take about 10-15 minutes. Then pour the filling over the pre baked crust and smooth the top with the back of a spoon or an offset spatula. Sprinkle the toasted coconut over the top. Let stand for about 6-8 hours or until the marshmallow has set.

To serve, run a knife around the inside edge of the pan, and then cut into squares. The bars can be covered and stored at room temperature, or in the refrigerator, for up to five days. They can also be frozen.

Garnish: Place the coconut on a baking sheet and bake in a 325 degree F (165 degree C) oven for about 5-8 minutes or until the coconut is lightly brownied. Watch carefully and stir the coconut often as it bakes to prevent over browning.

Makes 16 Marshmallow Squares. Preparation time 45 minutes.

View comments on this recipe on YouTube

Marshmallow Squares:

1/2 cup (113 grams) unsalted butter, room temperature

2 tablespoons (30 grams) light brown sugar

1 cup (130 grams) all purpose flour

1/8 teaspoon salt

Filling:

3/4 cup (180 ml) cold water

1 - 1/4 ounce package (a scant tablespoon) (7 grams) unflavored powdered gelatin

3/4 cup (150 grams) granulated white sugar

1/8 teaspoon salt

3/4 cup (85 grams) confectioners (powdered or icing) sugar, sifted

3/4 teaspoon baking powder

3/4 teaspoon pure vanilla extract

red food coloring (optional)

Garnish:

1 cup (60 grams) dried coconut (sweetened or unsweetened) (shredded or flaked)

Subscribe Now


New Videos


Contact Us   Privacy Policy

Use of materials on all pages on the domains Joyofbaking.com, joyofbaking.mobi, the Joyofbaking.com Facebook Page, @joyofbaking on Twitter, the Joyofbaking.com RSS Feed, the Joyofbaking.com email list the Joyofbaking1 YouTube Channel and any emails sent from @joyofbaking.com are entirely at the risk of the user and their owner, iFood Media LLC will not be responsible for any damages directly or indirectly resulting from the use.

References cited may include a link to purchase the referenced book or item on Amazon.com. Joyofbaking.com receives a commission on any purchases resulting from these links.

This website and the contents are not endorsed or sponsored by the owner of the "Joy of Cooking" series of books or its publisher Simon & Schuster, Inc. and is not related to the  "Joy the Baker" books and website. Video icons by Asher.

Content in any form may not be copied or used without written permission of Stephanie Jaworski, Joyofbaking.com.  Students and non profit educators may use content without permission with proper credit. 

A baking resource on the Internet since 1997

Copyright  1997 to 2023 iFood Media LLC