|
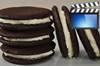
Chocolate
Wafers: In a bowl, sift or whisk together the flour, cocoa powder, baking soda, and
salt.
In the bowl of your electric stand mixer,
fitted with the paddle attachment
(or with a hand mixer), beat the butter until smooth. Add the sugars and vanilla extract and beat on
medium high
speed until light and fluffy (about one minute). Scrape down the sides and
bottom of the bowl as needed. Beat in the egg
white until well combined. Add the flour mixture and beat just until incorporated.
Place the batter
on your counter and, using your hands, roll into a log shape that is
about 8 inches (20 cm) long. Carefully wrap the log in parchment paper, wax
paper, plastic wrap, or foil,
and fold or twist the ends. Try not to flatten the
log. Refrigerate until firm. This will take several hours or you can even chill
it overnight. You can also freeze the log for about one month.
Preheat your oven
to 350 degrees F (180 degrees C) and place the oven rack in the center of the
oven. Line two baking sheets with parchment paper.
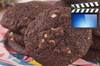
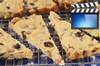
Place the chilled cookie log on a
cutting board and, using a sharp
knife, slice the log into about 1/4 inch (.6 cm) thick wafers. Place the wafers on the baking sheet, spacing about
2 inches (5 cm) apart. Bake for approximately 10 - 12 minutes
or until the the cookies puff and the tops of the cookies have cracks (ripples).
Remove from oven and place on a wire rack. Let the cookies cool on the baking
sheet for about 5 minutes before removing to a wire rack to cool completely. Can
be stored in an airtight container, at room temperature, for about 10 days. They
can also be frozen.
Makes about 30
Chocolate Wafers.
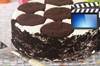
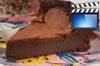
Icebox Cupcakes:
In the bowl of your electric stand mixer, fitted with the whisk attachment, (or
with a hand mixer or by hand with a wire whisk) beat the cream with the sugar
and vanilla until firm peaks form. Take one chocolate wafer and spread or pipe
(I used an Ateco #846 star tip) a generous tablespoon of whipped cream over the top of
the cookie. Cover with another cookie, then another layer of cream, another cookie, and a
final layer of cream. Cover and place in the refrigerator for about 24 hours or
until the chocolate wafers are soft. If desired, decorate with shaved chocolate,
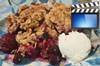
candy sprinkles, or fresh berries.
Makes 10 Icebox
Cupcakes.
View comments on this recipe on YouTube
|


