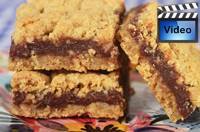
Date Squares are a
delicious combination of pureed dates sandwiched between two layers of buttery oatmeal
shortbread crust. more
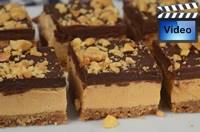
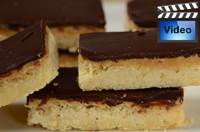
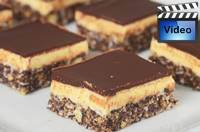
These three layer Bars
start with a Graham Cracker crust, that is covered with a soft and
fluffy peanut butter filling. They are topped with a shiny chocolate
ganache. more
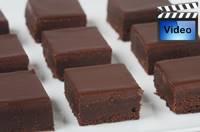
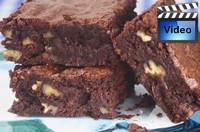
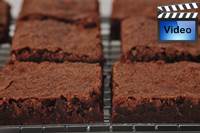
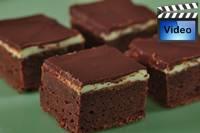
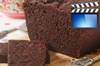
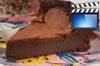
Chocolate Brownies have
a lovely deep chocolate flavor and dense fudge-like texture that are
topped with a smooth and glossy Ganache frosting.
more
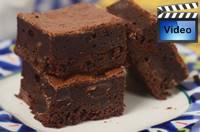
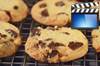
Brownies are America's
favorite bar cookie and these are rich and dense with chocolate.
more
Cocoa Brownies are made
with unsweetened cocoa powder which gives them a deep chocolate
flavor, and a cake-like texture that is wonderfully moist and chewy.
more
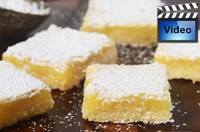
Lemon Bars start with a
delicious shortbread base that is covered with a lemony filling that
separates as it bakes; giving us a thin cake-like crust on top of a
tangy citrus-flavored sauce. more
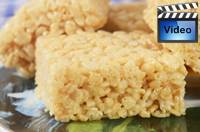
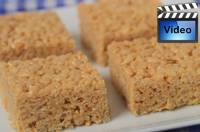
This delicious
candy-like square is made with rice cereal, melted marshmallows, and
margarine. more
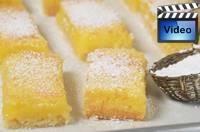
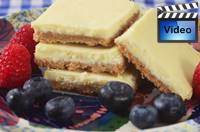
Lemon Shortbread Bars combine a buttery crisp shortbread crust with
a deliciously tart and tangy lemon filling. Instantly recognizable
by their liberal coating of powdered sugar.
more
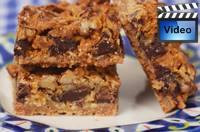
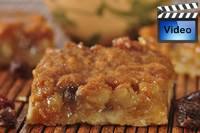
Magic Bars simply layer
six ingredients; melted butter, graham cracker crumbs, sweetened
coconut, chocolate chips, chopped walnuts, and a can of sweetened
condensed milk in a pan and the bars are baked. There is no mixing.
more
The latest Bars & Squares Videos
Catch up on all the latest bars & squares videos
by clicking
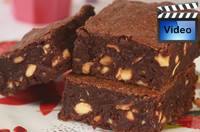
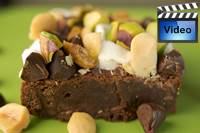
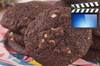
A moist and chewy Brownie
with the crunch of hazelnuts and containing three kinds of chocolate -
semi sweet, unsweetened, and unsweetened cocoa powder.
more
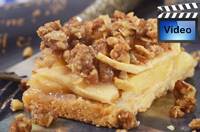
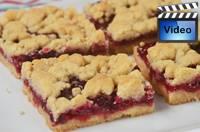
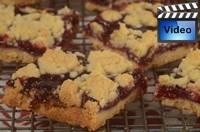
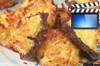
A three layer bar that combines a buttery
crisp shortbread base with lightly sweetened apple slices topped with a crisp and
crunchy streusel. more
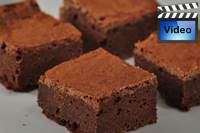
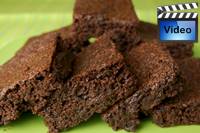
These Fudgy Chocolate
Brownies have a rich and deep chocolate flavor and dense fudge-like
texture. more
The story goes that
gossip columnist Liz Smith got the recipe from the actress to publish in
her column. That was about 25 years ago and since then these brownies
have only grown in popularity.
more
This recipe contains
all the necessary S'more components; chocolate, marshmallows, and graham
crackers only presents them in bar form.
more
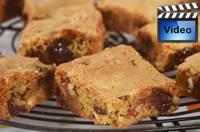
Blondies, or you might know
them as Butterscotch or Blond Brownies, have a dense and chewy texture
and taste of butterscotch. more
Rugalach is a Eastern
European cookie that is made with a cream cheese flavored dough that is
cut into triangles and rolled around a filling to form a crescent. This
recipe makes Rugalach in bar form which is much less work.
more
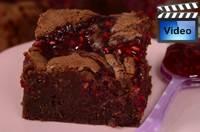
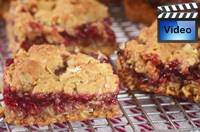
Raspberry Brownies swirl
dollops of raspberry jam through a brownie batter. The combination of
dark chocolate and raspberries is delightful.
more
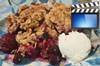
These little gems
are baked until the crusts have nicely browned and the filling has
set. They are excellent warm from the oven, at room temperature, or
even chilled. more
S'mores are deliciously
sweet and gooey. They take roasted marshmallows and pieces of chocolate
and sandwiches them between two graham crackers.
more
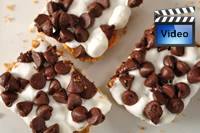
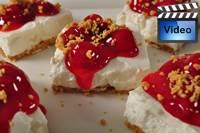
Cherry Squares have a sweet
and grainy graham cracker crust that is topped with a soft and creamy
marshmallow filling and sweet canned red cherries.
more
Chocolate Mint Brownies
consist of a dense and fudgy brownie that is topped with a mint flavored
butter frosting and a shiny chocolate glaze.
more
This popular British
shortbread consists of three delicious layers; a buttery shortbread, a
smooth caramel, and a shiny layer of melted chocolate.
more
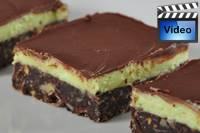
While browsing
through the website it suddenly occurred to me that there wasn't a
recipe containing both chocolate and mint. I decided the perfect
dessert to feature these ingredients was a three layer square,
really a Nanaimo Bar, only peppermint flavored
more
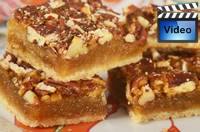
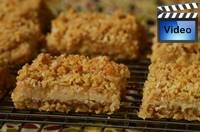
A delicious Square that
combines a buttery crisp shortbread crust with a sweet and gooey
filling that is filled with pecans. more
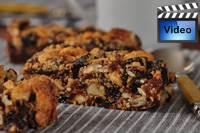
These fruit and nut bars are
chewy and crunchy and loaded with flavor. They are healthy for us as
they contain lots of dried fruit and nuts and the batter has no butter
or oil in it. more
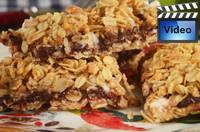
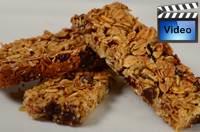
Granola Bars are full of
oats, dried fruits, seeds, and nuts that are coated in a sweet and
sticky mixture of butter, brown sugar, honey, and vanilla.
more
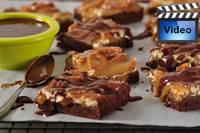
Turtle Brownies consist
of a fudgy brownie that is topped with a layer of caramel mixed with
toasted pecans, and finished with a drizzling of melted chocolate.
more
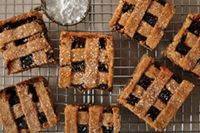
Linzer Squares have a
beautiful golden brown lattice crust made with ground nuts (almonds
and/or hazelnuts) and spices and filled with ruby red raspberry
preserves. more
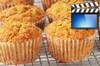
Pumpkin Cranberry Bars
are moist and full of flavor and beg to be cut into large chunks and
served with a steaming hot cup of coffee or tea.
more
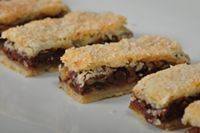
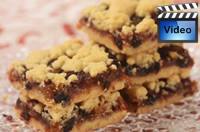
Mincemeat Shortbread
Bars have two buttery layers of shortbread sandwiched with a layer
of spicy mincemeat.
more
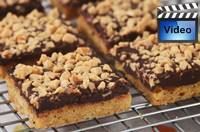
Toffee Bars are a
delicious combination of buttery brown sugar shortbread and dark
chocolate, covered with a sprinkling of toffee bits or finely
chopped nuts. more
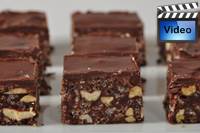
Rocky Road Brownies
are amazing, with their deep chocolate flavor and dense fudge-like texture
topped with gooey melted marshmallows jumbled together with
chocolate chips and nuts. more
Chocolate Peanut Squares are
a delicious combination of peanut butter, cocoa powder, marshmallows,
rice cereal, and peanuts. more
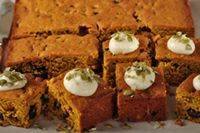
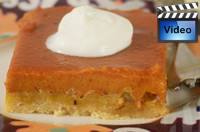
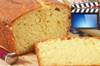
Pumpkin Bars are a delicious
combination of a buttery crisp shortbread crust, a layer of toasted
pecans, and a creamy smooth pumpkin
filling. Lovely garnished with a piped rosette of whipped cream.
more
Low-Fat Brownies have a wonderfully moist
and chewy texture and a
deep chocolate flavor. They
are wonderful plain or topped with fresh berries and/or a scoop of
low fat vanilla ice cream, frozen yogurt, or a fruit sorbet.
more
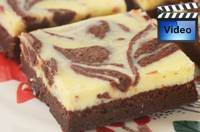
Cream Cheese Brownies
combine a dense and fudgy chocolate brownie with a cheesecake-like
topping. more
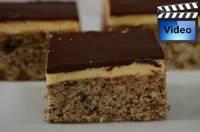
Also known as Tweed Squares.
This bar starts with a white cake containing flecks of chocolate,
followed by a layer of buttercream, all topped with a layer of
chocolate. more
This delicious
Lemon Bar combines a tangy sweet lemon filling with a top and bottom
crust that contains rolled oats, coconut and nuts.
more
Nanaimo Bars are British
Columbia's best known confection. They are wonderfully rich with two
layers of chocolate that are separated by a layer of buttercream
icing. more
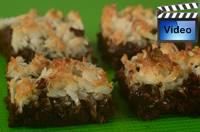
A delicious candy-like
combination of a chocolate brownie with a moist and chewy coconut
macaroon topping. more
This takes the original
Rice Krispies Treats®
to a whole new
level by adding three types of chocolate (unsweetened cocoa powder,
dark chocolate, and chocolate chips).
more
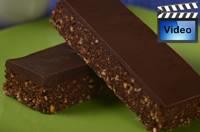
Enjoy this gluten free, no
bake Chocolate Energy Bar full of peanuts, dates, and chocolate. So
good. more
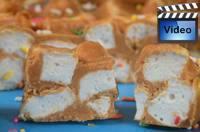
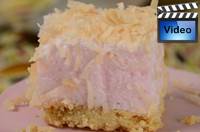
It's hard to beat this delicious
square, with its fluffy marshmallow filling sandwiched between a buttery
shortbread base and loads of toasted coconut.
more
Have
you ever wondered why
"Bars and Squares" are officially categorized as a 'Cookie'
and not as a 'Cake'? The experts must have done this
because of its batter as it is dense and cookie-like in
texture. The other thing they have in common is that
'cookies' and 'bars and squares' are casual desserts; the
type you take to bake sales, picnics, potlucks, and other
community events. But that seems to be where their
similarities end. For unlike cookies where the batter is
dropped in mounds on a baking sheet, or formed into
individual balls, or even rolled out and cut into pretty
shapes, a batter for squares is
simply spread into a pan. It is only after baking that they
are cut into individual portions. This is where it seems
more like a cake, although we cannot deny that a bar is much
thinner than a slice of cake and often not as pretty to look
at.
The range of
Bars and Squares is vast but basically we can divide them
into two types; the 'one step' and the 'two step'. The
'one step'
is when there is only one layer to the bar, a good
example being the Brownie. The 'two step' is when there is more than
one layer; often that means a 'crust' and a 'filling'; for
example Lemon Bars and Nanaimo Bars.
Probably the most famous 'bar and square' is the Brownie, which
began its life in a Sears, Roebuck and Co. catalog over 100
years ago (1897). Brownies were so named because of their
dark brown color, not because they contain chocolate. In
fact, the first brownie recipes didn't even have
chocolate in them.
There are a
few things to keep in mind when making squares. Always
use the size of pan called for in the recipe. If you use a
different sized pan you will have to adjust the baking time
otherwise the texture of the bar will be affected. It is
important to prepare your pan as stated in the
recipe. There is nothing worse than making a beautiful pan
of squares only to find you can't get them out of the pan.
The best way to prepare the pan is to line it with aluminum
foil. The foil will need to be long enough that there is
some overhang on two opposite sides
of the pan, to use as handles so you can remove the bars from
the pan after baking. So, to do this, you first need to turn
your pan
upside down. Then, take a piece of foil and center it, shiny side down,
over the pan. Smooth the foil over the sides and corners to
shape the foil to fit the pan. Once you have done that,
remove the foil, turn the pan right side up, and place the
shaped foil in the pan.
After baking
and cooling the squares, remove them from the pan by lifting
the edges of the foil. Place on a cutting board and, using a
sharp knife, cut into squares. But before I do this I like
to trim the hard outside
edges first so that every square looks the same as the next. The trick to getting a nice clean cut for each
square is to wipe your knife between cuts, so have a damp
cloth nearby. To make sure every square is the same size, use a ruler to mark into
equal sized
pieces.
If you need to transport the bars, store them
between layers of parchment or wax paper in an airtight
container..
Rice Krispies Treats®
is a trademark of Kellogg's NA Co.
Use of materials on
all pages on the domains Joyofbaking.com,
the Joyofbaking.com Facebook
Page, the
Joyofbaking1 YouTube
Channel and any emails sent from @joyofbaking.com
are
entirely at the risk of the user and their owner, iFood Media LLC
will not be responsible for any damages directly or indirectly resulting
from the use.
References
cited may include a link to purchase the referenced book or item on Amazon.com.
Joyofbaking.com receives a commission on any purchases resulting from these
links.
This
website and the contents are not endorsed or sponsored by the owner of the
"Joy of Cooking" series of books or its publisher Simon & Schuster, Inc.
and is not related to the "Joy the Baker" books and website.
Video icons by Asher.
Content in any form may
not be copied or used without written permission of Stephanie Jaworski,
Joyofbaking.com. Students and non profit educators may use content without
permission with proper credit.